Wishlist 0 ¥0.00

Upgrading from MySQL 5.7 to 8.0 on Windows

As you may know, I’m using MySQL exclusively on GNU/Linux. To be honest for me it’s almos 20 years that the year of Linux on the desktop happened. And I’m very happy with that.

But this week-end, I got a comment on an previous post about upgrading to MySQL 8.0, asking how to proceed on Windows. And in fact, I had no idea !

So I spent some time to install a Windows VM and for the very first time, MySQL on Windows !

The goal was to describe how to upgrade from MySQL 5.7 to MySQL 8.0.

So once MySQL 5.7 was installed (using MySQL Installer), I created some data using MySQL Shell:

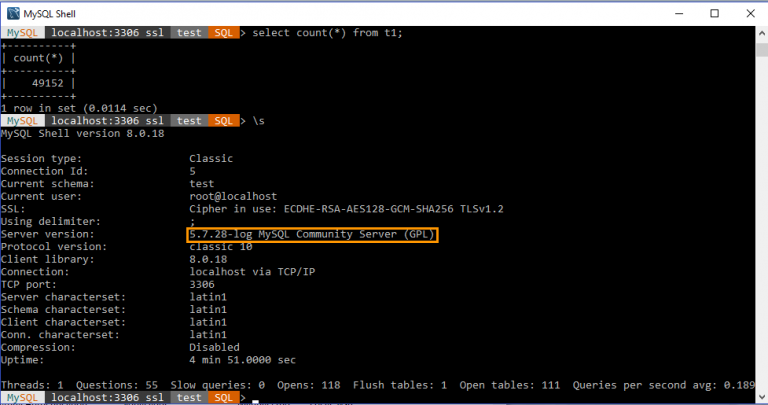
Of course I used latest MySQL Shell, 8.0.18 in this case. Don’t forget that if you are using MySQL Shell or MySQL Router, you must always use the latest 8.0 version even with MySQL 5.7.

Before upgrading, I ran MySQL Upgrade Checker to be sure everything is compatible with MySQL 8.0:

No problem, I’m good to go !

Don’t forget, now it’s the right time to perform a backup or a snapshot.

The first step is to stop the MySQL Service:

When done, you have to launch once again the MySQL Installer and use Modify your MySQL 5.7 Server product features to only leave the Sever data files checked:

When all is proceeded, you return to the MySQL Installer Product Overview and you Add a new product:

We select the latest MySQL 8.0 and there is no need to select Server data files, as we will upgrade our current data:

When is done, please stop the new MySQL80 service and modify the my.ini (of MySQL 8.0!) that is located in System\ProgramData\MySQL\MySQL Server 8.0 by default:

In that file, we modify the actual value of datadir and we point it to where was located the datadir of MySQL 5.7. In this example I only used the default values:

And now it’s the most tricky part of the upgrade process, when you save this file, you must specified the ANSI encoding:

If you don’t use the right encoding, when you will start the MySQL Service, in the error log you will have a message like this: [ERROR] Found option without preceding group in config file ... at line 1

When saved, you can start the service. It will take some times as MySQL will proceed to the upgrade of the system tables and other files as you can see in the error log:

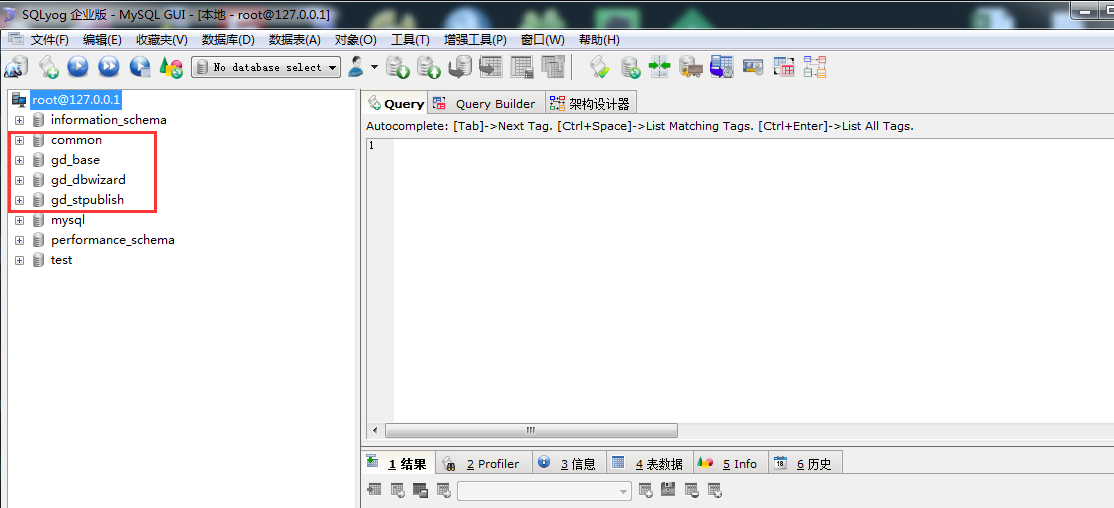
When the service is running again, you can connect and you should have access to all the data that was in you previous MySQL 5.7:

As you can see the test schema is there and of course we can check the content too:

I hope this post answers the questions of those that were experiencing issues when trying to perform an in-place upgrade from MySQL 5.7 to MySQL 8.0 in Microsoft Windows.

利用拷贝data目录文件的方式迁移mysql数据库

其实迁移数据库,一般用sql文件就行,把A服务器数据库的表结构和数据等等导出,然后导入到B服务器数据库,

但是这次数据文件过大,大约有40个G,使用命令行导入,效果不是很好,经常在执行过程中报错、卡死。

最后参考网上的帖子,复制源数据库的data目录下的文件,完成数据迁移。

步骤如下:

1.首先要确定data目录在哪里

这个问题困扰了我很久,因为网上的帖子大部分只是说拷贝mysql数据库目录下的data文件夹中的数据,但是data目录到底在哪里,并未说明,我开始是拷贝的MySQL安装目录中的data文件夹,但是显然这是错误的,拷贝后并未出现需要的数据库。


其实是拷贝mysql的数据存放路径,具体如下

C:\ProgramData\MySQL\MySQL Server 5.6\data(注意:ProgramData文件夹是隐藏的,需要先显示出来)

(也可以使用命令   show global variables like "%datadir%";来查找data目录

2.需要拷贝的文件包括:数据库文件(例如上图所示的gd_base、common、gd_dbwizard等数据库)和  ibdata1  (这个必须拷贝)

3.停掉mysql服务,将拷贝的文件复制到目标数据库的data目录中(路径和上面的一样在ProgramData文件夹中)

4.复制好后,启动mysql服务,用数据库连接工具连接数据库即可看到导进来的数据库


utf8_unicode_ci与utf8_general_ci的区别

当前,utf8_unicode_ci校对规则仅部分支持Unicode校对规则算法。一些字符还是不能支持。并且,不能完全支持组合的记号。这主要影响越南和俄罗斯的一些少数民族语言,如:Udmurt 、Tatar、Bashkir和Mari。

utf8_unicode_ci的最主要的特色是支持扩展,即当把一个字母看作与其它字母组合相等时。例如,在德语和一些其它语言中‘ß’等于‘ss’。

utf8_general_ci是一个遗留的 校对规则,不支持扩展。它仅能够在字符之间进行逐个比较。这意味着utf8_general_ci校对规则进行的比较速度很快,但是与使用utf8_unicode_ci的校对规则相比,比较正确性较差)。

例如,使用utf8_general_ci和utf8_unicode_ci两种 校对规则下面的比较相等:

Ä = A

Ö = O

Ü = U

两种校对规则之间的区别是,对于utf8_general_ci下面的等式成立:

ß = s

但是,对于utf8_unicode_ci下面等式成立:

ß = ss

对于一种语言仅当使用utf8_unicode_ci排序做的不好时,才执行与具体语言相关的utf8字符集 校对规则。例如,对于德语和法语,utf8_unicode_ci工作的很好,因此不再需要为这两种语言创建特殊的utf8校对规则。

utf8_general_ci也适用与德语和法语,除了‘ß’等于‘s’,而不是‘ss’之外。如果你的应用能够接受这些,那么应该使用utf8_general_ci,因为它速度快。否则,使用utf8_unicode_ci,因为它比较准确。

Windows中无用的服务名怎么删除

一、什么是Windows服务

Windows服务也称为Windows Service,它是Windows操作系统和Windows网络的基础,属于系统核心的一部分,它支持着整个Windows的各种操作。诸如DNS客户端、打印程序、Windows更新服务、计划任务、Windows时间服务、告警器等服务,它们关系到机器能否正确运行。如果不能适当地管理这些服务,就会影响到机器的正常操作。

一个服务首先是一个Win32可执行程序,或者是是rundll32.exe来运行一个。dll的方式形成的进程。

跟普通应用程序不一样,如打开WORD,有一个界面出来,但服务没有用户界面。也不能通过直接双击运行相应的。exe程序来运行。那Windows又是如何控制一个服务的?

Windows的服务由更上一级的services.exe这个服务来管理,由它来管理,负责进行服务的启动、停止、运行,暂停等。我们最常用的操作就是通过Windows的服务MMC界面来完成相关操作。

二、如何删除Windows服务

现在的流氓软件,越来越多把自己注册为一个服务。在Hijackthis的扫描日志中,一般会把非Windows系统的服务以023的方式列出来,如下面这段:

O23 - 未知 - Service: BKMARKS [提供传输协议的数据安全保护机制,有效维护数据传输中的安全及完整。] - C:\WINDOWS\SYSTEM32\RUNDLL.EXE

O23 - 未知 - Service: ewido anti-spyware 4.0 guard [ewido anti-spyware 4.0 guard] - D:\Program Files\ewido anti-spyware 4.0\guard.exe

O23 - 未知 - Service: KSD2Service [KSD2Service] - C:\WINDOWS\system32\SVCH0ST.exe

对于这些流氓软件,需要删除相关的。exe文件,使它不能再运行,或者直接清除这个服务本身,使计算机重启的时候,它不会再启动。

删除的办法有两个:

办法一: 用sc.exe这个Windows命令

开始--运行--cmd.exe,然后输入sc就可以看到了。使用办法很简单:

sc delete “服务名” (如果服务名中间有空格,就需要前后加引号)

如针对上面的: sc delete KSD2Service (这个方法我已经试过了可以的)

方法二:直接进行注册表编辑(不推荐)

打开注册表编辑器,找到下面的键值:

HKEY_LOCAL_MACHINE\SYSTEM\CurrentControlSet\Services 一般服务会以相同的名字在这里显示一个主健,直接删除相关的键值便可。

三、特殊情况

1、如果服务显示的是rundll32.exe,并且这个文件是位于system32目录下,那么就不能删除这个rundll32.exe文件,它是Windows系统的文件。这时只要清除相关的服务就可以了

2、如果一个服务删除了马上又自动建立了,说明后台有进程在监视、保护。需要先在进程管理器中杀掉相应的进程,或者启动后按F8,到安全模式下删除。

About Us

Since 1996, our company has been focusing on domain name registration, web hosting, server hosting, website construction, e-commerce and other Internet services, and constantly practicing the concept of "providing enterprise-level solutions and providing personalized service support". As a Dell Authorized Solution Provider, we also provide hardware product solutions associated with the company's services.
 

Contact Us

Address: No. 2, Jingwu Road, Zhengzhou City, Henan Province

Phone: 0086-371-63520088 

QQ:76257322

Website: 800188.com

E-mail: This email address is being protected from spambots. You need JavaScript enabled to view it.